Digs 2023

0 1333

By Lisa Howard

FROM FARMHOUSES IN ITS EARLY DAYS TO CHIC CONTAINER HOMES NOW, FERNDALE HAS SEEN MANY CHANGES in home styles over the years. “Ferndale was initially the bedroom community for the Henry Ford plant in Highland Park,” says Janis Froggatt, president of the Ferndale Historical Society and a resident of the city since 1972. The plant was only two miles away and a streetcar ran up and down Woodward, making it easy for workers to get to their jobs. “From 1924 to 1926, a lot of houses went up, especially on the west side of Woodward,” Janis adds. “Those were the big years.” Then in 1927, after ten years of being a village, Ferndale became a city.

The 1950s saw a boom in bungalow-building on the east side of Ferndale, largely in response to soldiers who had returned from World War II needing housing. In that same decade, Ferndale made the Guinness Book of World Records for having more kids per capita than any other city of its size in the country. The baby boomers had arrived! At its peak, the school system included 13 schools; high schoolers had to attend in two shifts because there were so many kids.

Generations used to stay in Ferndale, Janis says, but that trend has shifted drastically — the vast majority of homes in the city are bungalows, and now even native Ferndalians often want something bigger. Still, some new buyers are moving in and rehabbing the bungalows, and a few larger craftsman style bungalows are scattered throughout the city, particularly in the Drayton area west of Woodward. (That neighborhood boasts bigger homes originally built for doctors and professionals.)

A dozen or so historical kit homes are sprinkled into the mix, too. “If you go into your basement and look up and see a number stamped into the floor joist, you have a kit home,” says Janis. “Or if you have built-in cabinets between the kitchen and living room, see if there’s a number stamped there.”

ECHOES OF THE PAST CAN BE SEEN in other ways, too — for example, some houses west of Woodward don’t have driveways even though they have garages. That’s because residents originally accessed their garages via now-vanished alleys that ran behind the houses.

The median on Woodward is a remnant of streetcars that zipped passengers along the street. Post- streetcar, the area was paved over and made into parking lots from roughly a block north of Nine Mile to a block south of Nine Mile, but then the State of Michigan decreed that the positioning of the lots made them dangerous and the City had to get rid of them. (Wyandotte was the only other city along the corridor to have center-of-the-road parking lots.)

Perhaps the quirkiest homes in Ferndale, though, are the ones that were originally model homes at a lumberyard. In the 1920s, timber was a roaring industry in the Upper Peninsula and lumber was copious. People could go to the bank and get a mortgage, then go to a lumberyard to buy lumber to build their own home (or pay someone else to build it for them). One lumberyard in the area had 12 model homes on its lot to showcase the possibilities. When the timber era ended, the homes were disassembled by the bank, put onto trucks, and rebuilt in Ferndale. The last of those homes are clustered near the cemetery.

NOW, AS FERNDALE NEARS ITS 100TH ANNIVERSARY, it continues to be a bustling city where residents receive beautification awards for their noteworthy homes. You could say the main home style continues to be “proud resident.”

BLACKSMITHS WORK WITH ARCHITECTS AND DESIGNERS, CUSTOM HOME BUILDERS AND PRIVATE CLIENTS TO BUILD one-of-a-kind functional art and heirloom quality pieces that will likely outlast us all.

Iron gates, grills, railings, light fixtures, furniture, sculpture, tools are among the many items in your house or garden that might be craft- ed or eventually need repair by a blacksmith. Think about custom chandeliers and wine racks, fireplace tools and table bases, home address numbers, cabinet hardware, outdoor lanterns, and ornate backyard trellises.

It’s a pretty intimidating subject to most homeowners! But once you get past your fears, the art of blacksmithing is quite fascinating.

And you might be surprised to learn how much of it is within your own grasp. The basic tools (forge, an anvil, a hammer, tongs and a vice) needed to do your own blacksmithing cost as little as just a few hundred dollars.

OF COURSE, YOU WILL ALSO NEED THE GUIDANCE OF A PROFESSIONAL BLACKSMITH. CJ Forge, in Hazel Park, is a modern day blacksmith shop that focuses on custom ironwork for the home and garden. They actually host classes private welding lessons now and are happy to talk to you about your project or whatever inspires you.

These blacksmiths are true artists and craftsman and ready to help anybody interested in ironwork. They’re hoping to revive a dying art and they are reaching out to the community for your support. The shop is open full time to anyone interested in commission work and getting their hands dirty.

The most recent project, a mix of beauty and ruggedness was a large outdoor, botanical style sculpture for Seven Ponds Nature Center in Dryden, Michigan. It has hundreds of hand-forged chiseled leaves, flowers and vines, small bugs and whimsical birds, all wrapped around the entryway to their naturescape.

A nine-foot-tall tall garden gate was another recent, private commission comprised of life-like steel vines, leaves and brass coated flowers located next to a beautiful lake setting near Waterford.

A handcrafted, copper mailbox now adorns one of the most prominent homes in Palmer Woods and is sure to patina over time, only getting more beautiful with age.

ANOTHER GORGEOUS ESTATE NEARBY IS HOME TO AN ELEGANT FORMAL GARDEN and contains multiple works of art forged by the smiths in hazel park. Striving to create a real sanctuary, an antique gate restoration surrounds their custom fountain and hopefully more is yet to come.

A unique sunflower shepard’s hook was a fun local project for creative clients in Pleasant Ridge. The last custom piece recently shipped off in a solid wood crate destined for North Carolina: A custom made pot rack designed for a custom-made home.

To learn more about blacksmithing or if you need help with a project, contact CJ Forge at www.cjforge.net.

0 592

By Jenn Goeddeke

ARE YOU ONE OF THE MANY AMERICANS WHO ARE CONSIDERING A HOME ENERGY CONVERSION, from fossil-fuel based electricity to solar power, either fully or partially? It may not always be easy to know where or how to start the process. Plenty of people aim to live a more environmentally-friendly lifestyle, but have real concerns regarding cost, convenience, effectiveness and the overall reliability of a transition. You may wonder: What exactly is solar energy, and is there enough natural sunlight where you live to generate the energy required for your home?

To describe it briefly, there is an established technology known as Solar Photovoltaic (PV) which converts sunlight into a direct electric current (DC) through the use of semiconductors. This typically takes place using solar panels. An inverter converts the flow of DC into an alternating current (AC) for your household energy needs. Fortunately, there are some great sources of detailed information available, either online or through your local library or bookstore. Local interest blogs and social media postings, groups and videos are also worth reviewing. Plus, a variety of companies are set up specifically to provide estimates, good advice, and proper installation of the solar panels.

This particular article will focus on setting up a solar system to provide power to the inside of your home, but there is also a vast array of options for gardens, yards and landscaping.

WHY GO SOLAR? Solar power is the most abundant and cheapest energy source on Earth. Panels can produce energy without direct sunlight and can last up to 30 years. Solar energy is truly renewable, we will never run out of it!

Conversion to solar power has become a popular option and, according to the Dept. of Energy (www.energy.gov) there are now over one million solar installations nationwide. Most solar systems pay for themselves in less than ten years, and equipment is typically warrantied for about 25 years. But panels can lose some efficiency over the years. And labor warranties are shorter than those on materials, so factor that in.

I recently had the opportunity to consult with Rachel Engel, a local permaculture urban farmer and designer, who has successfully set up an eco-farm project in Ferndale. Engel’s educational background includes a master’s degree in evolutionary ecology from the University of Michigan, and she has been practicing permaculture for over ten years. Her outstanding childhood and adult memories are those connected with nature: Camping, foraging and hiking.

From Engel’s original design thesis/vision statement: “The overarching design goal is to convert a 1/4-acre suburban home into a food, energy, and medicinal-herb-producing ecofarm. The farm is powered by solar clean energy, heated by wood, with temperature regulation assisted by thermal curtains regulating airflow, and white curtains hung outside windows in the summer.”

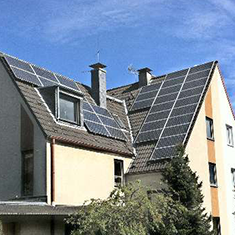
ENGEL’S HOME AND ECOFARM USE ONLY SOLAR POWER for electric needs. Gas power is used for some heat requirements, such as hot water, and they also have a woodburning stove. She emphasized that the transition to solar was smooth, and there is no difference in reliability. The solar panels are installed on the south-facing side of the garage, in a back garden area. The system was tied into the power exchange system with DTE, so when the panels overproduce energy can be pulled back or saved for cloudy weeks (clearly this is not an example of an “off the grid” situation).

REGARDING THE ACTUAL SOLAR PANELS, Engel pointed out that they are often rated to outlive us! Engel advises homeowners to “Start small, and be mindful of low-hanging fruit.” For example, you might want to try a portable system first (such as the Goalzero mobile office system) and find ways to economize simply around your home. Other first considerations may include installing energy-efficient windows; using environmentally-friendly insulation and installing energy-efficient appliances. Lighting options and use of electronics also factor into the equation. A home energy audit may prove to be useful in determining these factors.

For your next area of research, find out how much electricity you typically use based on your bill. This will help your potential installer produce a more accurate quote, and also determines the number of panels to be used on your roof. Also consider any potential plans. For example, are you thinking of purchasing an electric vehicle in the next few years? If so, you may want to include a few extra panels to the quote.

Secure a few different quotes. The price-per-watt is the main factor to consider, but certainly
not the only consideration. For example, the panels themselves vary in quality and efficiency. Plus, the size and shape of your roof is also a factor. How helpful and detail-oriented does the installer seem to be? Check that the licensure, insurance and certifications are all current from the North American Board of Certified Energy Practitioners (NABCEP).

ONCE YOU HAVE BIDS TO REVIEW, you will want to determine the source of financing. Cost factors vary, but an average cost of a solar panel installation here in MI ranges from around $15,000 to $20,000, (prior to rebates and tax incentives).

Fortunately, the final installation process is relatively straightforward: The installer draws up plans, obtains any necessary permits, and then installs the equipment.

It is always best to become familiar in advance with any possible hidden costs or complications that may surface. For example, look into the following aspects: some homes may need an upgraded electrical panel; there may be neighborhood or homeowner association restrictions; shade trees present, either your own or those belonging to your neighbors. What age is your roof, what condition is it in, and does it need to be replaced prior to a solar panel project? There are also a few rewards and incentives to gain information on. Check the Database of State Incentives for Renewables and Efficiency (DSIRE) to see availabilities by area). Your accountant can help with number-crunching, especially regarding any potential tax incentives.

To summarize: Make some simple and inexpensive changes to be more energy-efficient. Conduct research and figure your basic need for electricity, and sunlight avail- ability. Secure quotes from trust-
worthy contractors. Decide on financing options. Consider any hidden costs or hurdles. Take particular care with warranties and contracts and check your homeowner’s insurance and maintenance requirements. Finally, enjoy your new and improved ‘green footprint’ with a fully energy-efficient home!

Online information sources include: Popular Science (www.popsci.com); www.energy.gov; www.electricchoice.com; www.studentenergy.org; www.ecowatch.com; www.solaractionalliance.org; https://go.sunpower.com. Special thanks to Rachel Engel of the Ferndale EcoFarm for her insightful feedback.

0 606

By Ryan R. Ennis

LIKE MOST THINGS IN A HOUSE, DRYWALL IS SUSCEPTIBLE TO WEAR AND DAMAGE OVER TIME.

As the dwelling settles, hairline cracks suddenly form along the ceilings and the walls in the living room. During a move, the side of a heavy storage cabinet accidentally falls forward and hits near the corner of a wall, denting it. Each time a painting or poster changes location in the bedroom, it leaves behind unsightly holes to patch. These are just a few examples of common occurrences that calls for some know-how to repair.

Small holes, shallow dents, and thin cracks in the drywall are often viewed as easy fixes that you can do yourself. However, if these jobs aren’t done right, they can create more problems down the line. Holes will become bigger, dents deeper, and cracks thicker. It can sometimes help to disguise the problems by shuffling around different pieces of artwork and furniture, but that’s not always a guarantee that outsiders won’t see what you’re trying to disguise.

The best solution is following the correct procedures to get the jobs done. Here are some suggestions on how you can restore your walls and ceilings:

FOR THE SMALL HOLES AND CRACKS, START OFF BY FILLING THEM WITH SPACKLE, then smoothing out the excess with a putty knife so that the area is thoroughly covered. Once the mixture dries, simply sand the spots until they are smooth and ready to be repainted. However, if the diameter of the damage is greater than an inch, you will probably need to tape the spot before spackling. Paper tape works best for corner repairs. If the holes or dents are not directly in the corners, fiberglass mesh tape will do the trick. No matter how steady your hands are, bulges or bubbles in the tape can appear as you lay it down. Try to smooth them out with a putty knife before spackling and sanding. If the putty knife doesn’t help, you might have to take off and re-apply the tape until it’s even with the walls.

Because drywall is vulnerable to nail pops bursting through without warning, you most likely will be faced with mending those as well. When you first notice them, you might believe an easy remedy is dabbing some paint over them. However, a proper fix involves driving them back with a hammer into the wall; then putting in drywall screws over and under the sites of the nail pops. From there, you can level them with joint compound. If this procedure isn’t followed, there’s a likelihood the nail pops will show back up.

Whether you’re dealing with holes, dents, cracks, or nail pops, a typical mistake is sanding the site too vigorously after the compound or spackling dries. When too much pressure is exerted on a wall or corner during sanding, you gamble removing part of the paper face. Once the paper face has been rubbed off, it usually results in a bumpy or uneven surface. That will lead to reapplying the spackling, waiting for the spot to dry again, and then re-sanding the area. To prevent this from happening, you might find it easier to use fine sand (150 grit) paper attached to an electric or a hand sander. For getting into hard-to-reach areas, such as corners, a fine sanding sponge should be sufficient to flatten any unevenness in the compound.

AS A FINISHING STEP TO THE SMALL REPAIRS, YOU WILL GATHER THE SAME SUPPLIES that you initially bought to paint or texture the surfaces before the damage: In other words, the same types of rollers, sponges, brushes, etc. that were initially used to paint or create their smooth, semi-smooth, or rough- er textures. As you paint or apply the texture, make sure to cover not only the location of the repair but also the area around it. After the fresh coat of texture or paint has been blended in with the rest of the wall, the site should look as good as new.

When it comes to repairing larger holes or dents in the drywall, the process becomes more involved. To begin, outline a rectangular shape around the bad area, then use a sturdy single-bladed saw with a sharp point that can punch through and cut out the damaged drywall. Using another sheet of drywall, draw and score a matching rectangular piece. This new piece will be inserted into the wall to cover what was taken out.

To secure the new section, apply joint tape around the seams and then camouflage it with joint compound. If the joint tape fails to hold it in place, try installing some furring (or wooden) strips in the opening where the damaged section was removed. The strips serve as a reinforcement or backing for the new drywall piece as you fasten it in with drywall screws. Once again, you will need to sand to create a level surface before re-painting it.

WHEN IS IT TIME FOR A PROFESSIONAl to step in? Since it’s your home and project, you call the shots. Whether you’re dealing with small wall and ceiling repairs, or looking at a room with massive amounts of drywall damage, it’s perfectly all right at any time to reach out to experts who install drywall for a living. They have the necessary skills and equipment to guarantee the work. To find and hire a reputable drywall contractor near you, check out the website: www.bbb.org.

By Ryan R. Ennis

ACROSS NORTH AMERICA, ALARMS SHOULD BE SOUNDING ABOUT WHAT THE FUTURE HOLDS for the creatures who fertilize our flowers and crops. Environmentalists at Pennsylvania State’s Center for Pollinator Research report that beekeepers have been losing significant amounts of their colonies each year. Conservationists at the Center for Biological Diversity stress that Monarch butterflies are
now hovering near extinction. And scientists at the Cornell Lab of Ornithology declare that many bird species are also endangered. All of this seems to imply impending doom for our natural world.

In response to the crisis, the researchers are also looking at the reasons why wildlife populations are decreasing. Some of their investigations show that a major contributor is the expanse of traditional lawns in our cities. When lawns consist of just sod or grass, they create what is called a “monoculture,” or the growing of a single plant. Acting as a “dead zone,” the lack of diverse vegetation disrupts the natural food webs. As birds swoop down over the grass, they frequently find no caterpillars to snatch and feed to their babies. Despite roaming for hours and miles, butterflies and
bees often fail to come across any clover or milkweed to feast on. With so little nutrients available, it’s no wonder that birds and insects are dying off.

Regular lawns can be detrimental to the environment in other ways. Possessing short root structures,
both turf and sod lack the ability to soak up the water from heavy downpours. The surplus water runs off our lawns, fills up the storm drains, and puts unnecessary stresses on our infrastructures. This same rainwater flooding our drains and sewers oftentimes contains the fertilizes we use to treat our lawns.

Eventually, the chemicals end up in our rivers and lakes, resulting in an overabundance of algae growing in them. By blocking out the sun and absorbing all the oxygen near the surface, the massive algae blooms diminish the lifecycles of the creatures and plants whose homes are our waterways. Humans are affected by the invasive plant as well. If we happen to canoe or kayak across a stream full of bacteria-ridden algae, we risk exposure to the harmful toxins being released in the air.

LANDSCAPING OPTIONS THAT HELP WILDLIFE

AS A WAY OF HELPING NATURE TO REBOUND, Ferndale Garden Club President Dominic Scappaticci proposes that we “rethink what a traditional lawn should look like.” For decades, owning a house or condo with a lush lawn has been the benchmark in suburbia. A well- maintained yard often communicates to others that we care about ourselves, our neighbors, and our communities. It also provides appropriate places where dogs can walk and sniff, children can play, and outdoor parties can be hosted. To design these spaces, Scappaticci says that we don’t have to lay down sod or plant only grass seed. Instead, we help the environment by choosing to create a bee lawn in our yards.

“Bee lawns,” explains Scappaticci, “are a mix of lawn grass and low-growing plants that attract pollinators.” Some of the plants that entice bees include clover, creeping thyme, and the herb called self-heal. Although these plants all flower, the blooms remain small enough to survive the lawnmower blade. Since bee lawns can be trimmed, we can still use them for recreation. Another advantage of bee lawns is that they are able to endure significant fluctuations in the weather. Perhaps best of all, they require limited watering and no chemicals to stay green.

“A lot of research concerning bee lawns,” reveals Scappaticci, “has been conducted by
scientists at the University of Minnesota. They actually studied what kinds of seed mixes work best for withstanding the mower and people walking on them.” These mixes have been made available for the public purchase through commercial landscaping companies and online vendors, such as Twin Seed and Outsidepride Seed Source.

Installing a natural meadow is another environmentally-conscious option for us. “Natural meadows are a mix of native grasses and native meadow plants,” explains Scappaticci, “that are grown to full height. Thus, they are much taller than bee lawns.” This type of landscape has an even greater impact on our ecosystems. The taller plants provide habitats for insects to lay eggs and com-plete their lifecycles; as well as places for birds to feed, take shelter, and locate nesting materials.

One drawback to natural meadows is that the high vegetation makes it poorly suited for recreational activities. Another is the slight risk of ticks ending up in the tall grasses, so we shouldn’t let our children or dogs wander through them without taking precautions.

SELECTING & NURTURING NATIVE PLANTS

“BEFORE TRYING TO ESTABLISH A NATURAL MEADOW, know the soil,” Scappaticci advises. “It will
determine the types of grass and perennials that should be planted.” For drier or sandy Michigan ground, the following non-invasive grasses will grow well: prairie dropseed, Canada wild rye, and switchgrass. For damper Michigan soil, the following will work better: sedges, swamp milkweed, and Joe
Pye weed. Some flowering perennials that attract pollinators and can be mixed with the grasses are milkweed, purple coneflowers, blazing star, and native asters. “Plants appropriate for meadows,” he adds, “need full-sun exposure.”

If we plan to grow a bee lawn, “it can be done simply by overseeding,” says Scappaticci. In the spring, this involves thoroughly raking our yards, then sprinkling a bee lawn mixture over the grass, with heavy seed concentrations on any bare patches. After a few rainfalls, the low-growing grass and flowering plants that bees love will begin to expand across the lawn. To maintain a bee lawn on our property, we will only need to mow the yard every few weeks and possibly reseed in some areas the following year.

Unlike a bee lawn, a natural meadow requires more thought, labor, and time to cultivate. According to Scappaticci, the best technique is to “start with a clean slate.” That means removing all the existing vegetation in the location where the meadow will go in early spring. To smother any regrowth, the soil
should be covered with either weighted-down sheets of card- board or black plastic tarps. In some instances, the tarps are preferred because they absorb sunlight and transfer intense heat into the soil, which kills off the seeds from the old vegetation.

After a month or so, we can take off the covers and then aerate the soil. To prevent any weeds from
invading, Scappaticci recommends immediately putting in an annual crop of clover or rye grass. In between the clover or rye grass is where meadow-flourishing perennials and native grasses will be planted. By the next year, the size of the native plants will increase in all directions to fully occupy the area.

If we don’t have weeks to devote to the project, there’s another method that takes less time. The steps to this other method are letting our grass grow long in a particular area, digging out any invasive weeds by hand, and then planting taller-growing perennials throughout the section. Since the original vegetation was never choked out, the second approach gives weeds the opportunity to come back more frequently.

Other than monitoring the meadows for weeds and other invasive plants, we most likely will find the upkeep of them to be relatively simple. A common city ordinance requires that property owners register their planned natural landscapes to avoid receiving a ticket for out-of-control vegetation. Another typical regulation is that the property owners must also retain a border of mowed lawn surrounding it. The width of the border should span several feet or more to ensure that our neighbor’s views are unobstructed as they pull in or back out of their driveways.

At the end of the growing season, Scappaticci says that we should “cut down some of the grass and perennials sections, which allows seeds to set in the soil for birds to collect and eat.” One portion of the meadow should remain standing to serve as a refuge for wildlife during the winter. Each year, he advises “alternating which section is left untouched” over the winter so that the varying plants and their seeds can provide food and shelter for different pollinators.

As a closing thought, he tells us not to be too hard on ourselves for any blunders in designing or caring for natural landscapes: “Simply try again. Even planting one native plant at a time will go a long way” to enhance nature in our communities.

OTHER SOURCES OF INFORMATION

IF WE NEED ADDITIONAL RESOURCES to help us under- stand how natural landscapes work, we can read the ecologist Doug Tallamy’s books on eco-friendly approaches to gardening. His books can be checked out at most public libraries.

Another option available is visiting the natural meadows that have been developed at both Palmer Park and Callahan Park in Detroit. Volunteers at the Detroit Bird City project look after these landscapes and encourage the public to stop by and take a stroll so that they can see the different native plants and how they draw a diversity of bird life.

To gain more knowledge on conservation, we can also join our local garden clubs, or become members of our city’s park & recreation and sustainability commissions.

Lastly, there is uniting with the Homegrown National Park movement. Its philosophy states that if everyone took a portion of their yard and converted it into a meadow, the combined sections would be larger than our national parks and therefore have a significant impact on the environment. Containing extensive information on native plants, the organization’s website is www.homegrownnationalpark.org.

0 604

By Ryan R. Ennis

A FACT, PERHAPS, UNKNOWN ABOUT CLOSETS IS THAT THEY WERE INVENTED DURING ROMAN TIMES,
and served as mobile cabinets where soldiers would stow their military gear during their journeys across the continents. The Romans called them “armoriums,” from which the present-day word “armoire” comes.

A fact commonly known about closets today is that, while they are intended to serve as convenient storage areas in our homes, they often turn into spaces jammed with hordes of clothing and unnecessary clutter. This lack of organization can especially try our patience when we reach into our wardrobes and struggle to find a particular shirt or pair of pants among the crammed attire.

Weary of the mess, we vow to make it a top priority to clean and rearrange our wardrobes in the near future. However, the task repeatedly gets postponed because, with our hectic lives, it seems too monumental to tackle. Yet, it can be done simply — in just five to six steps — if we commit to diving in and working methodically. Once the task is finished, the results will be well worth the time and effort.

THE FIRST STEP IS TO FETCH THE MATERIALS and tools for the project. Extra boxes or bins help with collecting clothing items as they are taken out of the closet. Tape measures might be needed for measuring any organizers (such as shelves or baskets) that will be fitted or installed inside the storage spaces after cleaning them.

A full-length mirror should be nearby for viewing our full images as we model the various items to determine which will be the “keepers.” Lastly, some additional boxes come in handy for holding miscellaneous stuff like receipts, money, combs, or anything else that we might uncover in clothing pockets and other places.

THE SECOND IS TO EMPTY THE CLOSET. “Starting with a blank canvas is almost always easier,” recommends Chris Dempsey, owner of Easy Glider Storage Solutions in Ferndale. Once the closet has everything removed from it, including hangers and baskets or bins, a better picture can form of how it should look as we put things back. “When designing a storage layout,” continues Dempsey, “the large items are accounted for first, and the smaller items later. This streamlines the process and makes designing much more intuitive.”

The third is to clean the closet thoroughly — every nook and cranny. A slightly damp dusting cloth or rag works better for cleaning than paper towel, which often shreds or rips apart on any rough or imperfect surfaces. Many housekeepers advise adhering to the procedure of cleaning from top to bottom. That means the top corners, the upper shelves, and the hanging rod should be dusted or wiped before any part of the wardrobe at eye level or below is touch- ed. After the shelves, walls, and baseboards have been cleaned, the bottom of the closet should be vacuumed or mopped depending on the kind of flooring it has.

THE FOURTH IS TAKE INVENTORY OF OUR STOCK, including the accessories. At this stage, the sorting begins for the three main piles mentally labeled as “keepers,” “possible donations,” or “not sure yet.” To assist with the decision-making, we can see how the older attire looks on us in front of the mirror.

Any item that has rips, tears, or holes beyond repair should make its way into the trash. A certain number of duplicate items — for example, 20 out of our stock of 30 brown leather belts—should be relocated to a storage box or other storage area in the home.

As we revisit the pile noted as “not sure yet,” Marie Kondo (the developer of the
KonMari Method) suggests asking ourselves three basic questions about each item: Whether it’s loved, worn much, or crucial to our sense of comfort and fashion. The answers to these questions will determine where these items ultimately end up.

THE FIFTH IS TO RETURN ALL THE ITEMS designated as “keepers” to the closet in a way that arranges or collects similar articles of clothing together. To illustrate — all jeans and pants will be hung up nicely together; shirts, blouses, and dresses will be grouped and hung sequentially according to sleeve length and color; and sweaters or pullovers will be grouped by colors, neatly folded, and stacked on the shelves.

It is also during this phase when we might need to buy and install more shelving, bins, baskets, hooks, or organizers with gliding drawers to maintain objects like belts, shoes, jewelry, and purses. Before closing the closet doors, we should conduct a final check of its appearance. Anything that looks out of place should be moved around until it fits in well with the rest of our belongings.

The sixth, as often advised by experts on organization, is to get rid of stuff that isn’t used or useful, typically by dropping them off at a local donation box or facility. For those of us who aren’t quite ready for this step, Dempsey recommends “storing rarely used items in the basement and the garage in other cabinets or containers.” Over time, we may feel differently about the items that we once thought of as “not sure yet,” and finally consider parting with them. If we want to earn some extra cash, there’s the option of selling the articles in good condition online or at a garage sale.

DESPITE THE SATISFACTION THAT COMES WITH WELL-ORGANIZED CLOSETS, it might not take long for us to fall back into old, bad habits. After long days on the job, we find it tempting to stop putting things away neatly and to start tossing our stuff again into the closets before going to bed.

If we recognize that our closets are getting out of control, we can improve the situation by scheduling a morning or day each week, each month, or perhaps each season for straightening out our belongings. This routine will, hopefully, keep our closets from creating more problems in life when we need to locate a particular possession in a hurry.

0 628

By Sara E. Teller

IF YOUR HOUSE IS ABOUT TO GO ON THE MARKET, THERE ARE CERTAIN PROVEN STEPS THAT WILL INCREASE IT’S VALUE AND SALABILITY.

We spoke with Frank Thomas, a top contractor in lower Oakland County, to learn about why homeowners may want to increase their home’s value, and what can be done to do so. He said, “Either they want to live there and want things to be comfortable and pleasant; to look good and to feel good about what they’ve done. Or they’re putting their home on the market and want to appease new buyers.”

To appease those buyers and to make a home more competitive, opting for neutral paint colors over dramatic, statement colors will help sell a property faster. Frank says, “If a homeowner is putting their place on the market, it’s important to appeal to a wide range of buyers. This means avoiding customized décor or making it specific to their taste.”

It also pays to do some research in order to target a home’s style and décor to what’s coveted in the area. Go to open houses, take notes on how friends décor- ate, and read home magazines, preferably local ones. “It’s important to know the market and stay on top of trends. People change, the market changes,” said Thomas. Going for popular appeal is a no-brainer when you are starting from scratch and staging an empty home. Staging homes, when possible, is highly recommended.

INCREASING VALUE, INSIDE & OUT

FOR THE INTERIOR, MANY DON’T WANT TO, or can’t, spend the money to fully rehab their kitchens and bathrooms, but there are simple things that anyone can do to make a big difference. Here are some ideas:

Declutter: Simply removing clutter and keeping everything tidy not only can add appeal, but make a space seem bigger too.

Scents: Tending to, and eliminating, any lingering odors (i.e., from smoke or pets), can go a long way.

Fixtures: Changing out faucets, cabinet hardware, and light fixtures are all easy, inexpensive ways to update kitchens and bathrooms without going all in.

For the exterior of your home, there are simple touches that will help make a great first impression. Curb appeal is incredibly important. When buyers browse through real estate listings online, the exterior is the first thing they see (and maybe the last if the house isn’t dressed to impress).

Landscaping: You can update your home’s landscaping to add more character and charm. This just takes a trip to the nursery and some dirt under your fingernails.

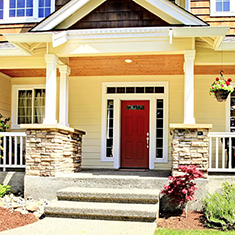
The Front Door: A home’s front door is a central focal point. Staining, repainting, or replacing it can help start a tour the right away.

Replace & Renew: Installing new exterior fixtures, shutters, and storm doors are all quick upgrades. Even getting new house address numbers can making a surprising difference in the look of your home.

None of these fixes cost much money, but they will all give your home a great boost.

GETTING THE MOST BANG FOR YOUR BUCK

OF COURSE, SOME INVESTMENTS GIVE HOMEOWNERS MORE BANG for their buck than others. Kitchens and bathrooms are two hot spots that are worth focusing efforts on. They can make or break a home sale, but they can also break the bank if you go overboard with renovations. Luckily, there are ways to dress them up that are budget-friendly, like changing out cabinet hardware or swapping out faucets and fixtures.

One great investment area people often overlook is the basement. Completely finishing the basement
might be impractical, but smaller steps like “giving it a new coat of paint or adding flooring to sections” can add a lot of appeal, said Thomas, who also recommends that homeowners pick a theme and have fun with it. “Whether that be a party basement, a gaming area, a kids’ space, or a gathering space,” Thomas suggests that sellers “plant the seed” for buyers to better understand the value it adds. Introducing some furniture and décor to fit the theme will do the trick.

WHERE NOT TO SPEND YOUR MONEY

SOME HOME INVESTMENTS MAY NOT BE WORTH YOUR TIME OR MONEY. If you’re looking to make substantial renovations to sell your home, it pays to take a critical look at the potential return on investment. The biggest problem, like we mentioned before, is decorating a home about to go on the market for yourself and what appeals to you, and not creating a neutral, blank slate that encourages the homebuyer to envision themselves there. Thomas said, “Some people might not like the neutral option, but they can still be satisfied with it and change it themselves.” It is always best to avoid over-customizing.

GET PROFESSIONAL HELP

IF DECIDING TO WORK WITH A PROFESSIONAL to get the job done, Thomas suggest, “Hire someone who has a good track record of starting and completing a job within a committed amount of time – who will show up when they say they will. For the past 15 years, it seems to be an epidemic and it’s sad, but people are leaving jobs unfinished, or they can’t commit to windows of time. You want to work with someone reliable.”

About Frank Thomas: Frank Thomas is an independently licensed contractor with more than 30 years experience. He specializes in tackling home repairs, full interior/ exterior renovations, finishing incomplete projects, and flipping homes. A top-rated provider on Angi (formerly Angie’s List), Thomas services lower Oakland County. He can be reached by calling or texting 248-901-6920.

0 659

By Lisa Howard

STATELY OAKS, SHOWY MAGNOLIAS, PLUCKY MAPLES…EVERYONE HAS A FAVORITE TREE.

Kerry Lark, a certified arborist with a horticultural degree who has taught at MSU and various community colleges, chose gingko trees and a dawn redwood tree for his property. Really, though, he loves all trees. “I’ve been digging in the dirt my whole life,” he says. “I hate cutting down trees — I always try to save them. I want to help all trees thrive.”

His mantra is “Right tree, right spot.” That isn’t always easy to adhere to, though, particularly if someone else put the tree there or if conditions around the tree have changed in unfavorable ways: A canopy tree that needs more sun gets shaded out, an understory tree that wasn’t meant to be in full sun suddenly is, soil conditions have become fundamentally different, and so on. Or maybe the tree has fallen victim to “weed whackeritis,” which is when people bang into the trunk of a tree with a weed whacker or lawn- mower and injure it. That kills a lot of trees, Kerry says, especially young ones. To prevent such injuries, he recommends cutting out the surrounding sod three feet out from the tree in a circle and putting down mulch — then the tree will be protected from physical damage. Although do not heap up mulch (or soil, or anything else) against the tree! That will rot the trunk.

ANOTHER CONSIDERATION WHEN PLANTING A TREE IS HOW BIG WILL IT GET? And what kind of shape will it have? Trees grow. It takes a while, but eventually, an ill-placed, ill-sized tree could become a hazard and might need to be tragically cut down before its time. Having all of the same type of tree could also be problematic, particularly if said trees are prone to disease — Dutch elm disease, chestnut blight, and emerald ash borer have all wreaked havoc in Michigan. That’s why Kerry is a proponent of incorporating both native and nonnative trees in urban landscapes.

“Nonnatives are resistant to the diseases they brought with them because they co-evolved with those diseases, whereas our native species have no resistance and they’ll get wiped out,” Kerry says. On top of that, just because a tree is native doesn’t mean it will thrive in an urban / city area — those surroundings are nothing like a forest. “Cities have a lot of pollution in comparison,” Kerry points out, “plus they tend to have heavy clay soil in a lot of areas.” One example of a tough nonnative are gingko trees: They can handle city pollution very well and don’t require any chemicals or inputs to remain robust.

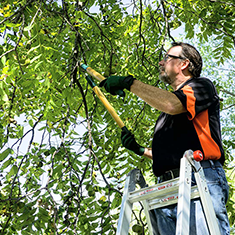
The inherent strength of a tree matters, too. Silver maples are notorious for not having a good structure (they tend to split themselves apart), mulberries are weak-wooded and fall apart in storms (but their admittedly messy fruits are delicious!), and trees like redbuds and American dogwoods are barely hardy in Michigan (you won’t see them north of here). On the plus side, judiciously pruning trees during the dormant months of November through March can help them have a stronger, better-shaped structure. What nonprofessionals call “suckers” and arborists call “epicormic shoots” take energy away from the rest of the tree, including the leaves and flowers, so it’s usually best to trim those.

It’s also sometimes possible to enrich the soil with amendments to help a struggling tree thrive. But really, the best way to help trees is to remember Kerry’s cardinal rule: “Right tree, right spot.” Thinking of planting a tree? To research your options, search for “MSU smart tree tips.”

Kerry Lark can be reached at 810-499-0953.

0 782

By Ryan R. Ennis

IN THE SPRING, WHETHER YOU’RE ON A WALK OR A BIKE RIDE, IT’S NATURAL TO PAUSE AND LET YOUR GAZE LINGER over the yards in the neighborhood with the most appeal. Enchanted by the vibrant gardens, you’re stirred with the desire to improve the scenery around your own property. With so many varieties of flowering plants available, it’s understandable to feel some intimidation about where to start.

According to some landscaping experts, a good way to begin is by figuring out what kinds of flowers you want to plant. The three primary types are called annuals, biennials, and perennials.

Robbin Yelverton, local florist and owner of Blumz by JR Designs, states that the differences between the flower types are “all based on (their) life cycles.” Annuals grow from a seed to a flowering plant in one season, then die. Examples of annuals include zinnias, petunias, marigolds, and most sunflowers.

Biennials, on the other hand, take two years to fully develop. During the first year, biennials sprout leaves; during the second, they bloom and make seeds. Some examples of biennials are parsley, sweet William, black-eyed Susan, as well as certain varieties of foxgloves and hollyhocks.

Non-woody, flowering plants that live longer than two years are perennials; some of which are
coneflowers, daylilies, yarrow, and blazing star.

“In the garden,” says Yelverton, “these three types of plants are used for differing purposes.” Some basic reasons are to achieve beauty, to help the environment, or to accomplish a combination of both.

Some gardeners prefer to add annuals to their beds since these flowers come in many colors. The different varieties are often mixed and matched for visual impact. Another benefit of annuals is that they will grow quicker and bloom longer than perennials and biennials. Toward the middle and end of the season, as perennials and biennials fade and wither, homeowners can fill in the gaps in their gardens with new annuals.

And because annuals don’t come back, there’s no need to worry about them crowding out the plants that will return the following year. A drawback of annuals is that they are highly susceptible to chilly weather and, thus, should only be planted in late spring, usually after the second week of May, when frost exposure is no longer an issue.

CONSEQUENTLY, OTHER GARDENERS CHOOSE TO GROW BIENNIALS because of their hardiness. “They are more tolerant of cold weather and often re-seed more effectively,” explains Yelverton. “Once they are planted, they typically will continue to return for subsequent seasons.” Nevertheless, a disadvantage of planting biennials can be their unpredictability: while it commonly takes two years for them to reach maturity and bloom, some may complete their life cycle in one year, others in three. Therefore, waiting for biennials to fully grow may require patience.

When gardeners want robust vegetation that burst with blooms during the first growing season, they often install perennials to enliven their landscaping. “Once established and well-maintained,” Yelverton says, “a perennial will continue to flower each year for several years. They form the actual structure of the garden since they stay in place for years and continue to grow and expand.” In the process, they supply ground cover and preserve moisture for the soil.

Another advantage is that they are easily increased by splitting them and replanting the sections
of the original plants to produce new ones. Furthermore, several varieties make the nectar and pollen that bees love to devour. A couple of problems with perennials are that they can be vulnerable to disease and take up more space than annuals in the gardening beds.

AFTER WEIGHING THE PROS AND CONS of the different types of flowers, you may feel ready to head out to the nearest nursery or gardening center and make some purchases. Nonetheless, Dominic Scappaticci, President of the Ferndale Gardening Club, has five other points to keep in mind before buying
any plants.

The first is to promote caterpillars. Asters, hollyhocks, ironweed, and mallows are just some of the plant species that host caterpillars, which birds feed to their babies to ensure the survival of their next generation. The second is to read the instructions that come with the flowers. Based on their spatial, lighting, and watering needs, will they thrive in the locations you’ve picked? The third is to visit a public library: it serves as a good resource with its many books and magazines about gardening, along with its access to database articles covering the topic.

The fourth is to talk to other gardeners during your neighborhood strolls. “You’ll get tips and ideas from them,” offers Scappaticci, “and maybe make a friend.” The fifth is to understand that sometimes plants die, even when you do everything right: “It happens to the most advanced and to the newest gardeners. Don’t let it deter you,” he emphasizes.

BEFORE BRINGING ANY PLANTS HOME, make sure you have the necessary materials and tools for planting. According to Yelverton, the average home gardener should have at least the following to complete the task: a hand trowel for planting annuals, weeding, and cultivating around the plants; and a quality pair of hand pruners for trimming and pruning. Keeping these items sharp and well-oiled will ensure that they last for many years.

While some may not consider gardening gloves as a tool, wearing a sturdy pair can prevent your hands from receiving abrasions, cuts, and irritations from plant saps and foreign debris in the soil. Yelverton has a trick for ridding yourself of any dirt that penetrates the gloves and settles beneath the fingernails: “Coat your nails heavily with a good hand lotion prior to putting on the gloves. It makes cleaning your nails after the job is done so much easier.” Other common tools needed by gardeners are shovels, forks, rakes, and hoes — all proving useful for breaking up, aerating, and weeding the soil.

AFTER THE TOOLS ARE GATHERED, the next step might involve planning where some new gardening beds will go. Before digging, observe and mentally note how much natural light the areas under consideration will receive. This survey will tell you whether you should put in plants requiring shade, partial shade, or full sun. From there, outline the beds using an old gardening hose or
thick string. The hose or string can be rearranged until you’re satisfied with the shape, “saving you many headaches in the long run,” Scappaticci says. A problem you might discover while digging is that the area has too much clay in it. To amend the earth, mix in some compost or soil conditioners. The products significantly improve the land’s ability to hold in water and nutrients.

Once the beds have been prepared, Scappaticci recommends another procedure to follow as your plants make their way into the ground. His first suggestion: To promote the plants’ healthiness, “check the flowers over for broken stems or yucky leaves and remove them.” His second: “Dig holes as deep as the length of the soil in the pot and twice as wide,” to ensure the openings will appropriately accommodate your plants’ roots and can be backfilled with the right amount of quality soil and organic matter to cover the root bulb.

His third tip: As you take the plants out of the pot, “use your fingers to massage and loosen roots so
that they don’t stick together.” This method encourages the plants’ roots to spread out in the soil, thereby providing a good foundation for supporting their stem or stalks.

0 958

By Sara E. Teller

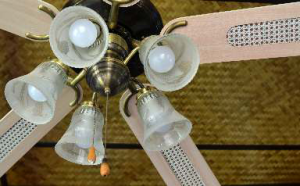
IF YOU’VE NEVER THOUGHT ABOUT INSTALLING A CEILING FAN, YOU MIGHT WANT TO CONSIDER IT.

We spoke to Frank Thomas, a top contractor in lower Oakland County with more than 30 years experience, to learn why ceiling fans are such a valued fixture. Thomas specializes in tackling home repairs, full interior/exterior renovations, and flipping homes. Here’s what he had to say.


Sure, the whirling breeze of a ceiling fan feels great on a hot, summer day, but their primary benefit is saving on electricity usage, lowering bills, and helping the environment in the process. Thomas recommends running a fan all the time. He said, “Instead of running the AC in short spurts, a homeowner can constantly run their fan, and this will cool the room down just as effectively while saving money.”

And, to make the most out of the fan’s energy efficiency, Thomas offered this pro tip: “Most people don’t realize it but there is a tiny switch, about the size of a fingernail, just above the blades. This adjusts the draft so that in the summertime there can be a fuller circulation of air. Most of the time, the instructions are tossed after installation or a homeowner doesn’t do it themselves, so this gets overlooked.”

SELECTING THE PERFECT FAN

IF A CEILING FAN’S KEY BENEFIT IS SAVING ON THE ELECTRIC BILL, what sort of initial investment are we talking about? Thomas said, “The average is anywhere from a very basic fan that’s around $100 to $1,000 or more. It’s a very wide range that depends mainly on quality.”

“Quality” means both aesthetically pleasing and efficient. Thomas explained, “Homeowners often look at aesthetics. They want it to be pretty. However, quality also means the fan operates efficiently. It’s important to consider this, too, when making a purchase.”

The key is to get a fan that’s adequate for the space. “Homeowners need to look at CFMs, which is the amount of air a fan circulates, as well as the size of the blade,” Thomas said. “The size of the blade should correspond with the size of the room. So, for a smaller kitchen, blades should be around 42 inches. They go up from there to about 52 inches. There are even fans with 60-inch blades that are perfect for large family rooms, vaulted ceilings, or even a small office if it needs to be kept at a cool temperature without running the air conditioning.”

Here’s another pro tip. If you buy a ceiling fan with a light, plan on buying a new bulb for it, too. Thomas explained, “Most bulbs that come with fans nowadays aren’t really designed to give off much light. The manufacturers assume people will replace these. They package the most energy-efficient bulbs with them.” You might also need to buy some ancillary accessories a la carte to install it, like a brace.


PROPER INSTALLATION

NOW THAT YOU HAVE FOUND YOUR PERFECT CEILING FAN, what’s next? You can always hire a professional contractor, like Thomas, to help you install it. If you like to do things yourself, however, putting one in shouldn’t be too hard. Make sure to read the manufacturer’s instructions, since they will all have variations, and specific configurations will vary, but these are the essential steps you can expect if you are replacing an existing fixture:

1. Carefully remove what’s there. After turning off the electricity, take off the globe or shade from your existing ceiling light and remove any screws and detach any wires holding it to the ceiling.

2. Replace the junction box with one that can support the weight of the ceiling fan. If you’re lucky, your current box will be rated for ceiling fan use; however, most standard junction boxes are not. If you need to change it out, disconnect the wires from the box and remove any screws holding it to the ceiling.

3. Install the new junction box. You’ll likely first need to install a ceiling fan brace, which is essentially a metal bar that connects to ceiling joists to support the weight of the fan. Then, a saddle or a bracket with screw holes may need to be attached to the fan brace so you can connect the ceiling box to the brace. Finally, feed the electrical cable through the new box and screw the box to the brace.

4. Wire the fan to the ceiling. Your wiring will depend on the configuration of your house. Secure
the ceiling fan to the ceiling and do any leftover assembly, like attaching the blades to the fan. Don’t forget to turn the electricity back on! After it is up and running, you should be set for many years of cool breezes and lower energy bills.


About Frank Thomas:

Thomas is an independently licensed contractor with more than 30 years of experience helping homeowners build or renovate their dream homes. A top-rated provider on Angi (formerly Angie’s List), Thomas’ home base (a “traveling office”) is in Royal Oak, and he services lower Oakland County. He can be reached by calling or texting 248-901-6920.